|
 |
|
 |
|
| Autor |
Nachricht |
g_boxwood

Anmeldungsdatum: 08.06.2006
Beiträge: 172
|
 Verfasst am: Do 05 Jun 2008, 17:51 Titel: Yokosuka 'Ohka' RC Rocket Glider Verfasst am: Do 05 Jun 2008, 17:51 Titel: Yokosuka 'Ohka' RC Rocket Glider |
 |
|
Hi everyone!
My very first post in here... quite excited!
I didn't find an explicit RCRG (Radio-Controlled Rocket Gliders) section in the forum so I thought I could either post in the LOW-MID section or in here since the subject is scale. Please let me know if it suits you and in case it doesn't just let me know what to do or (re)move it.
During the past few years I've been attracted by the idea of mixing r/c airplanes and rockets keeping everything 'legal' and I had to fight a certain lack of scale subjects: many good and pleasant RG are fantasy designs which are fine but not exactly what I'm looking for...
One of my searches for suitable models led me to this subject: the WWII Japanese suicide winged-bomb manufactured by Yokosuka and referred to as the MXY-7 Ohka 'Cherry Blossom'.
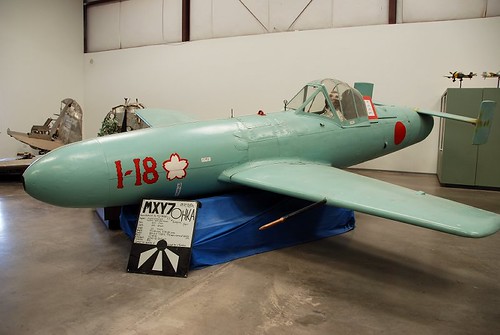
I know it, it looks ugly and its story isn't much happier... nonetheless I wanted to give it a try and started gathering infos.
I got the plans (originally published by Aviation Modeller) on e-bay along with a construction article that gave me a lot of positive infos:
1. the model does look ugly but it flies surprisingly well despite its narrow wing;
2. the featured model already flew as a RCRG with 2xD12P and in a 2xD12-0 to 2xD12P staging configuration without any problem (it was towed to height, released, flown back and ignited to height again).
I was happy because I had nothing to re-invent and because I was dealing with something that had already worked in a similar scenario.
Let's get started then...
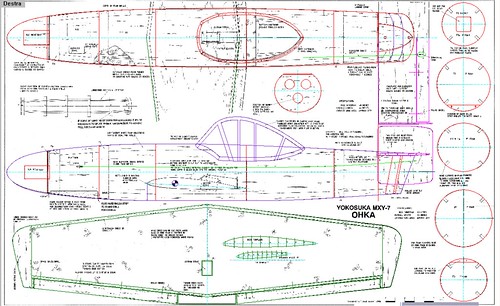
The Plans
Plans are for a 1/5th sport-scale version whose specs are:
Wingspan: 105 cm
Length: ~ 111 cm
Max fuse width: ~ 14.7 cm
Weight range: 905 to 1358 grams
Major off-scale points are:
. the canopy outline and framing
. the wing position (moved back for better flying)
. the tail group dimensions
I found them reasonable, a little bit on the large side but much more enjoyable because of that in the end.
What really turns me off is the construction method based on foam: I hate it and I decided to re-design the fuse to meet my personal building tastes.
I acquired the plans and started to model a 3D mock-up to guide me through the design of the new fully built-up fuse:
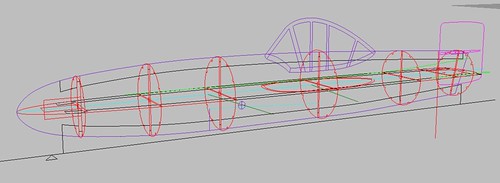
Tha was one of the very first model that underwent both major and minor mods as the building progressed...
[to be continued...]
_________________
Giacomo 'g_boxwood' Bosso
TRA#9986 L2 |
|
| Nach oben |
|
|
|
 |
|
 |
|
|
|
|
| Autor |
Nachricht |
Juerg
Site Admin

Anmeldungsdatum: 27.02.2005
Beiträge: 4545
Wohnort: Oberengstringen
|
| Verfasst am: Do 05 Jun 2008, 18:02 Titel: |
|
|
Für eine (maschinelle) Deutsch-Uebersetzung hier schauen:
UEBERSETZUNG DEUTSCH
Hi Giacomo
"Long time no see"! 
How are you doing.
Great to hear from you!
I have added a babelfish Link for the readers who don't know Englisch
What motors are planned? A G12 is on the low side for take-off, unless you use two motors in sequence like on the test glider...
Take care
Juerg
_________________
http://www.SpacetecRocketry.com
Zuletzt bearbeitet von Juerg am Fr 06 Jun 2008, 20:18, insgesamt 3-mal bearbeitet |
|
| Nach oben |
|
|
|
|
|
|
|
|
|
|
| Autor |
Nachricht |
g_boxwood
Anmeldungsdatum: 08.06.2006
Beiträge: 172
|
| Verfasst am: Do 05 Jun 2008, 18:47 Titel: |
|
|
Hi Juerg!
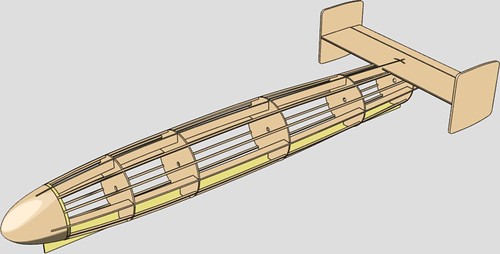
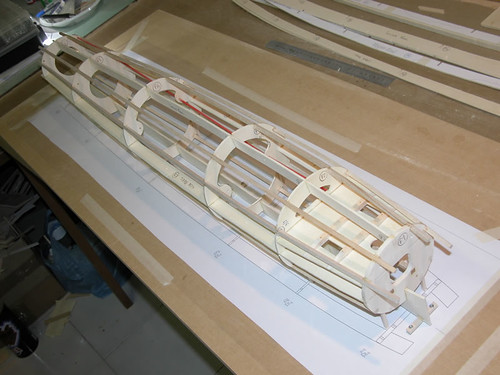
Here it is how it looks after the first 3 fuses have been built:
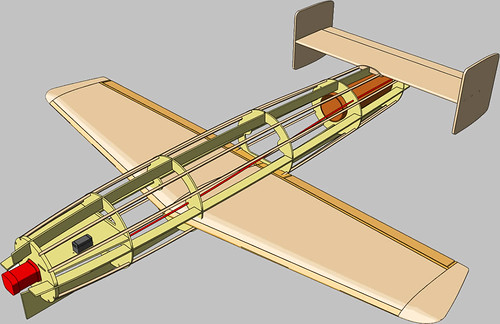
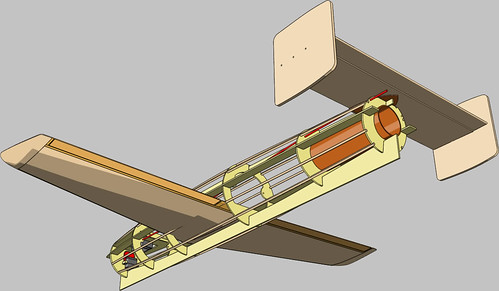
The fuse consists of:
. [4] 3 mm lite-ply keels: [1] lower keel, [1] upper keel and [2] identical side keels;
. [6] 3 mm lite-ply formers, F1 to F6 with F5 and F6 supporting the custom 60 mm ID MMT;
. [8] 5x5 mm balsa stringers.
I designed a servo tray sandwiched between F1 and F2 and I did include it in the first fuses: it prooved a non-sense as the very few RC parts could be located in the ample nosecone...

_________________
Giacomo 'g_boxwood' Bosso
TRA#9986 L2 |
|
| Nach oben |
|
|
|
|
|
|
|
|
|
|
| Autor |
Nachricht |
g_boxwood
Anmeldungsdatum: 08.06.2006
Beiträge: 172
|
| Verfasst am: Do 05 Jun 2008, 18:52 Titel: |
|
|
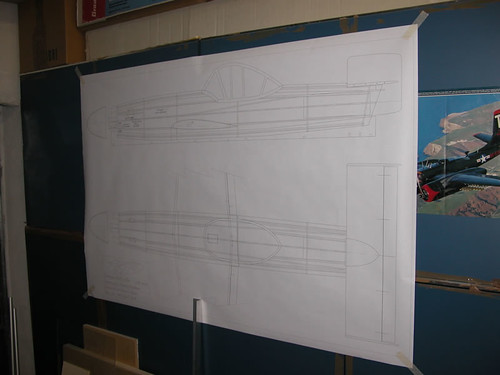
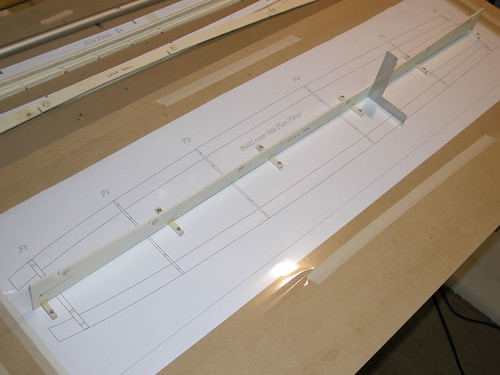
I then projected the 3D mock-up to get 2D views I could build over:
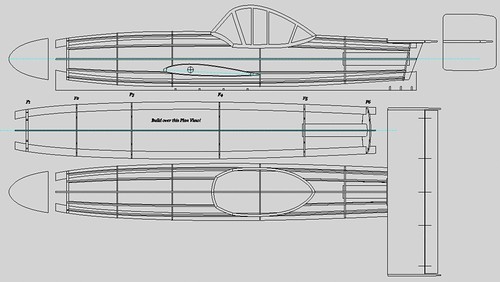
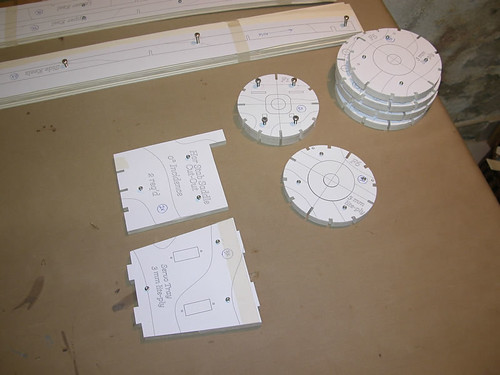
Templates were drawn as well...
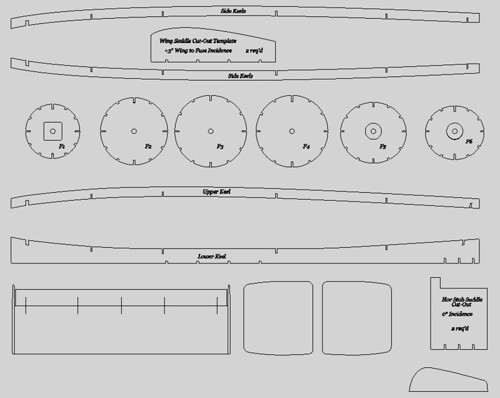
... and everything got printed at the local shop.
The prototype plans hang in the workshop so I can take notes on them as the assembly processes and mishaps show up:
Templates are transferred to the wood and cut:


_________________
Giacomo 'g_boxwood' Bosso
TRA#9986 L2 |
|
| Nach oben |
|
|
|
|
|
|
|
|
|
|
| Autor |
Nachricht |
Juerg
Site Admin
Anmeldungsdatum: 27.02.2005
Beiträge: 4545
Wohnort: Oberengstringen
|
| Verfasst am: Do 05 Jun 2008, 18:54 Titel: |
|
|
Why a 60mm motor mount?
Sounds like a very weird selection?!
Cheers
Juerg
_________________
http://www.SpacetecRocketry.com
Zuletzt bearbeitet von Juerg am Do 05 Jun 2008, 21:08, insgesamt einmal bearbeitet |
|
| Nach oben |
|
|
|
|
|
|
|
|
|
|
| Autor |
Nachricht |
g_boxwood
Anmeldungsdatum: 08.06.2006
Beiträge: 172
|
| Verfasst am: Do 05 Jun 2008, 18:58 Titel: |
|
|
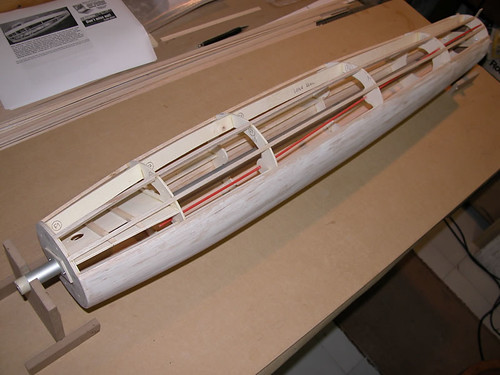
The real assembly starts:
. the lower keel gets screwed 90° to the building board directly over the plans:
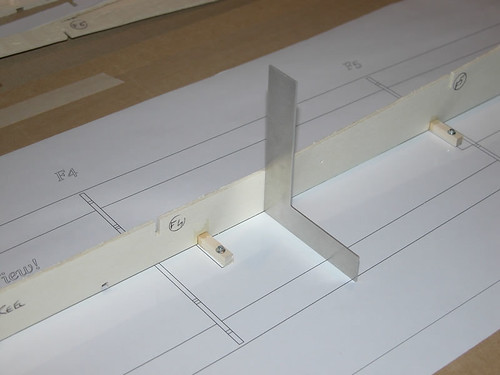
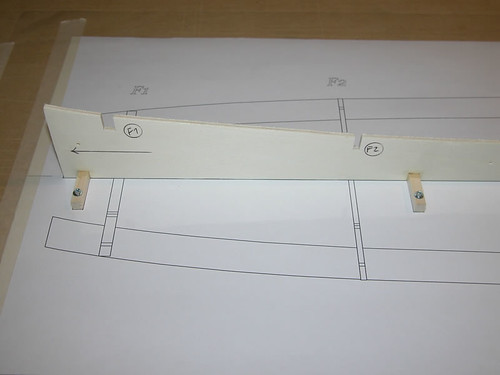
. all the formers are slid over an aluminum supporting tube and they are inserted into the corresponding keel notches:
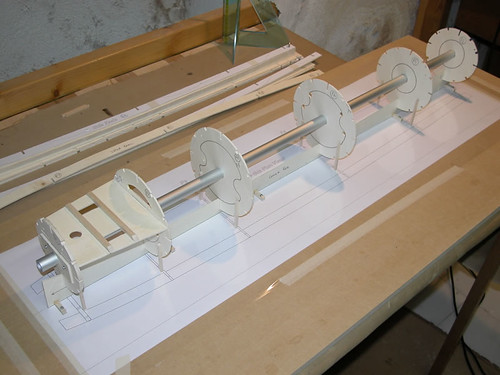
Sad note: here it is the useless servo tray:

_________________
Giacomo 'g_boxwood' Bosso
TRA#9986 L2 |
|
| Nach oben |
|
|
|
|
|
|
|
|
|
|
| Autor |
Nachricht |
g_boxwood
Anmeldungsdatum: 08.06.2006
Beiträge: 172
|
| Verfasst am: Do 05 Jun 2008, 19:03 Titel: |
|
|
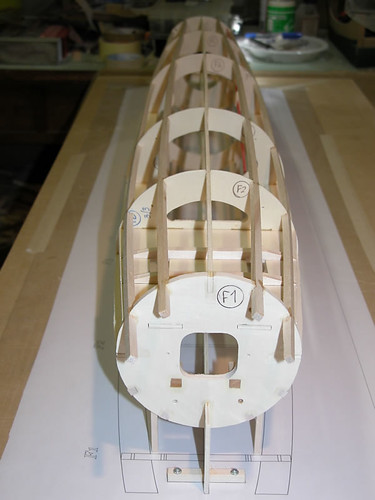
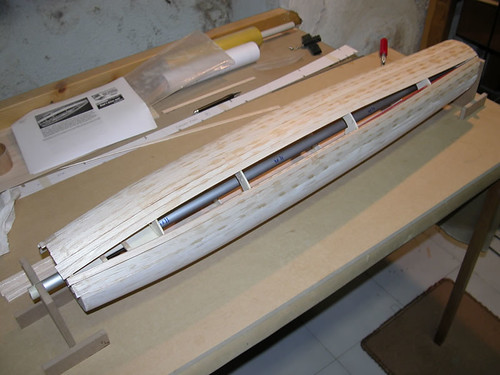
. each former is checked for 'squarity' with respect to both the building board and the longitudinal axis:

. side keels and outer elevator snake are added:

. the [4] bottom stringers are added:
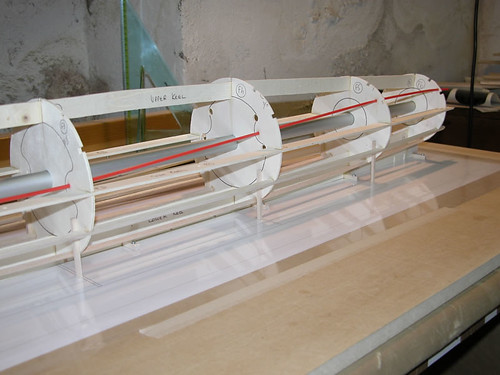
. the aluminum tube is removed and each former gets its lightening:
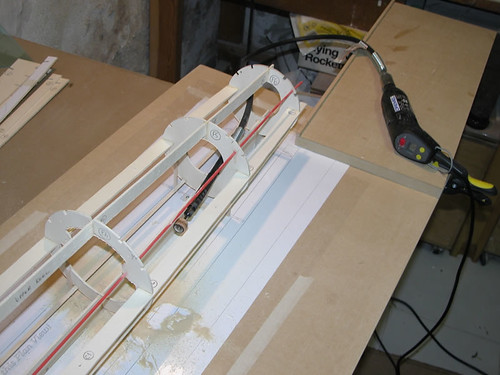
. the [4] top stringers are added:
. everything is checked for straightness:
_________________
Giacomo 'g_boxwood' Bosso
TRA#9986 L2 |
|
| Nach oben |
|
|
|
|
|
|
|
|
|
|
| Autor |
Nachricht |
Juerg
Site Admin
Anmeldungsdatum: 27.02.2005
Beiträge: 4545
Wohnort: Oberengstringen
|
| Verfasst am: Do 05 Jun 2008, 19:04 Titel: |
|
|
mmm, delicious
_________________
http://www.SpacetecRocketry.com
Zuletzt bearbeitet von Juerg am Do 05 Jun 2008, 21:09, insgesamt einmal bearbeitet |
|
| Nach oben |
|
|
|
|
|
|
|
|
|
|
| Autor |
Nachricht |
g_boxwood
Anmeldungsdatum: 08.06.2006
Beiträge: 172
|
| Verfasst am: Do 05 Jun 2008, 19:06 Titel: |
|
|
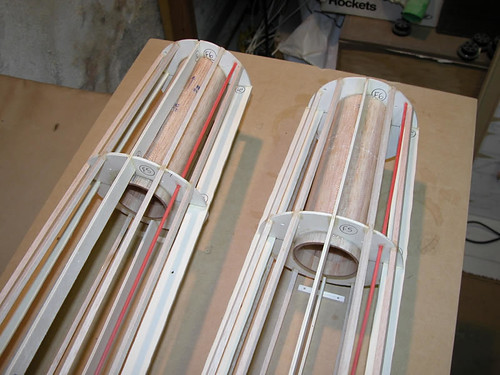
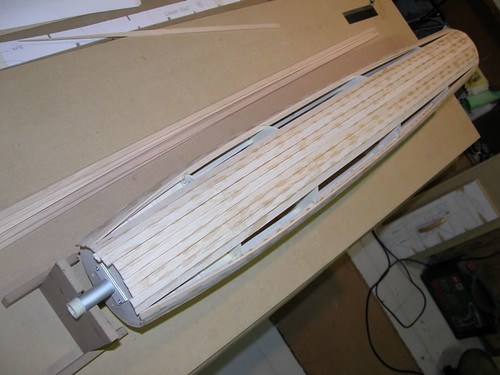
Second set of fuses on the board:

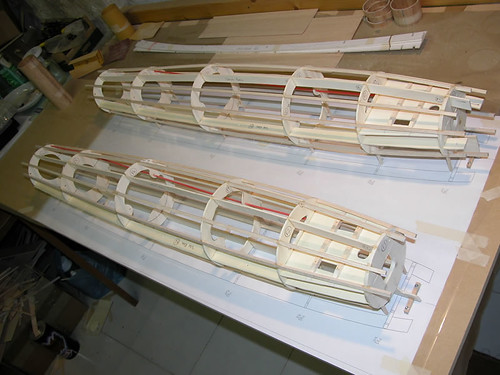
Motor mount tubes epoxied in place:

_________________
Giacomo 'g_boxwood' Bosso
TRA#9986 L2 |
|
| Nach oben |
|
|
|
|
|
|
|
|
|
|
| Autor |
Nachricht |
alessio

Anmeldungsdatum: 05.09.2007
Beiträge: 1071
Wohnort: Carasso
|
| Verfasst am: Do 05 Jun 2008, 19:10 Titel: |
|
|
ciao giacomo..
benvenuto!!!
e grazie per le tue sempre ottime foto/costruzioni
alessio
_________________
alessio
MO13
TRA11158 |
|
| Nach oben |
|
|
|
|
|
|
|
|
|
|
| Autor |
Nachricht |
g_boxwood
Anmeldungsdatum: 08.06.2006
Beiträge: 172
|
| Verfasst am: Do 05 Jun 2008, 19:19 Titel: |
|
|
Sheeting the Fuse
As the fuse is double-curved the only way to do it right is by strip-planking it with 2.5mm balsa strips about 10 mm wide cut to a trapezoidal section by easily modifying a Master Airscrew balsa stripper:
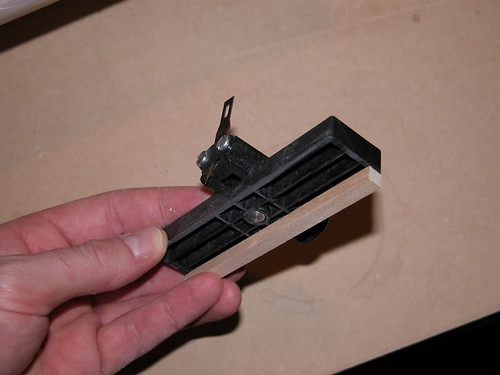
Even so the process is long and tedious and it requires a lot of patience and calm nerves: results at the very first tries aren't satisfactory and they usually do not get better by sanding, filling and by thinking 'I'll get it nice and smooth later'...
IOW: if you do it bad every following step will simply recall you how bad you got it done!
Do not get fooled by the pics: results are as described above, totally disappointing even if I started with a very positive attitude and with the best knowledge possible:
Stripper on Modelairplanenews
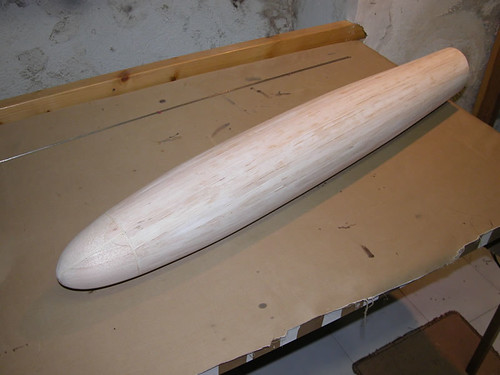
The bottom of the fuse took me one day at the end of which I could not stand the results and started sanding heavily and filling...

Next day, top half:
Then sanding and filling to help forget...

_________________
Giacomo 'g_boxwood' Bosso
TRA#9986 L2 |
|
| Nach oben |
|
|
|
|
|
|
|
|
|
|
| Autor |
Nachricht |
g_boxwood
Anmeldungsdatum: 08.06.2006
Beiträge: 172
|
| Verfasst am: Do 05 Jun 2008, 19:23 Titel: |
|
|
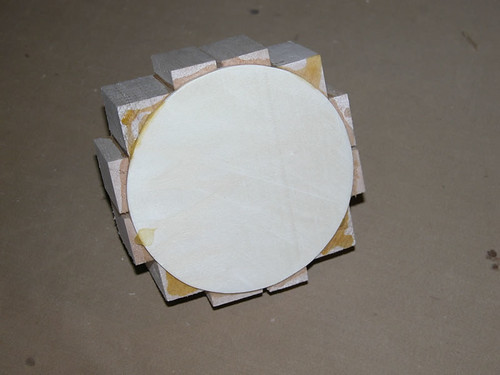
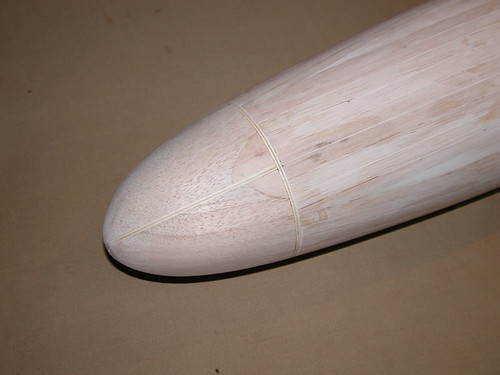
In the meantime I worked on the nosecone plug by filling a lite-ply frame...
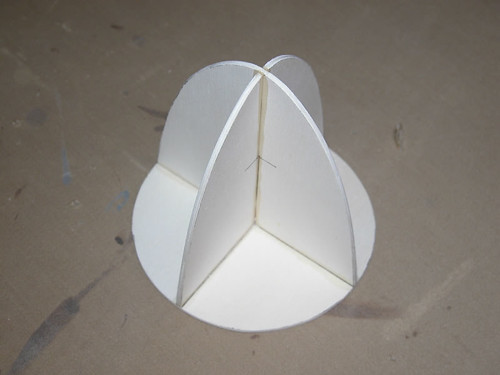
... with balsa blocks:
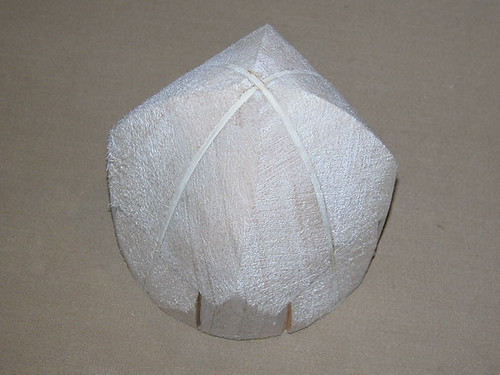
Final sanding takes place onto the fuse to blend the curves into each other:
_________________
Giacomo 'g_boxwood' Bosso
TRA#9986 L2
Zuletzt bearbeitet von g_boxwood am Do 05 Jun 2008, 20:13, insgesamt einmal bearbeitet |
|
| Nach oben |
|
|
|
|
|
|
|
|
|
|
| Autor |
Nachricht |
g_boxwood
Anmeldungsdatum: 08.06.2006
Beiträge: 172
|
| Verfasst am: Do 05 Jun 2008, 19:28 Titel: |
|
|
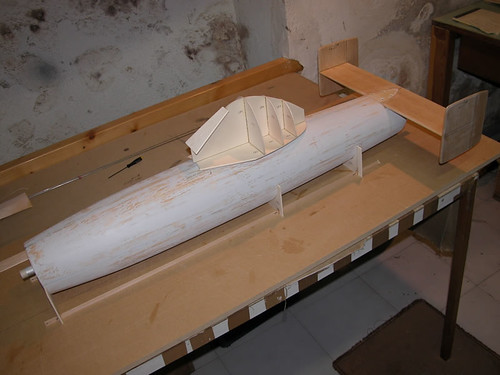
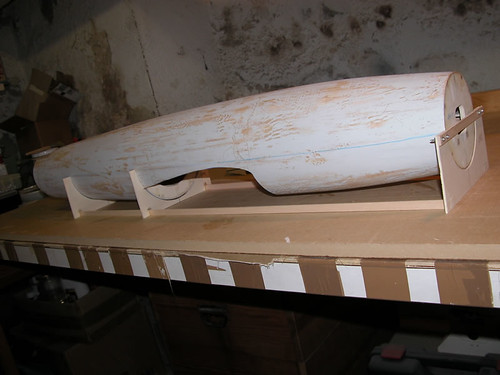
Both the fuse and the nosecone got a light fiberglass cloth (20 gr/mq) wrap:


I decided to prime the fuse top see how it looked and I then worked on the tailplane and cockpit frame:
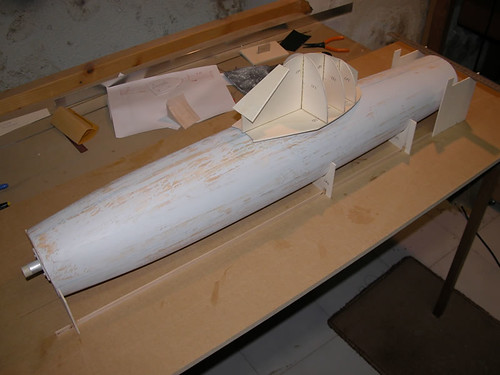
The stab saddle is cut using two ply templates as a guide:

_________________
Giacomo 'g_boxwood' Bosso
TRA#9986 L2
Zuletzt bearbeitet von g_boxwood am Do 05 Jun 2008, 19:33, insgesamt einmal bearbeitet |
|
| Nach oben |
|
|
|
|
|
|
|
|
|
|
| Autor |
Nachricht |
g_boxwood
Anmeldungsdatum: 08.06.2006
Beiträge: 172
|
| Verfasst am: Do 05 Jun 2008, 19:32 Titel: |
|
|
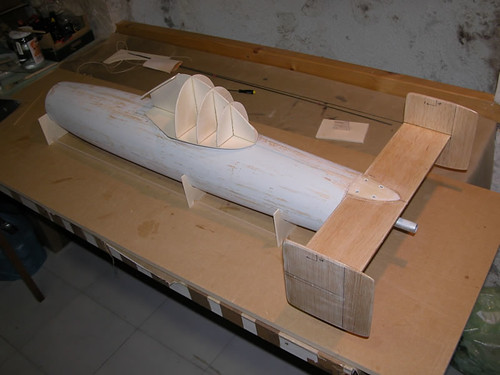
The stab saddle itself is a 1.5 mm birch-ply plate epoxied in place and sanded to match the fuse:
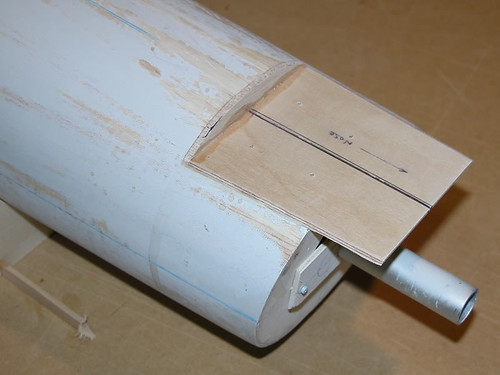
The stab is removable by the mean of 4 self-tapping screws; to keep the tail as light as possible I elected hard balsa and sanding sealer for the tail group:
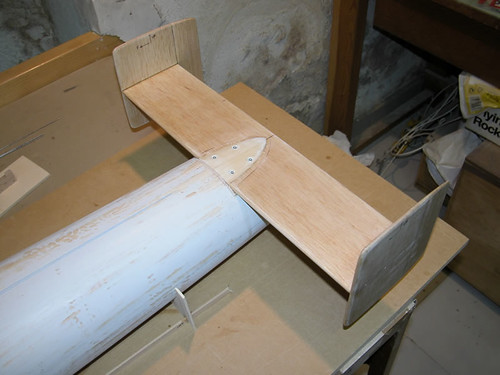
. the stab is 6 mm hard balsa
. the twin fins are 5 mm hard balsa
Some more views (do not mind the cockipt, the frame is bigger than the finished item):
_________________
Giacomo 'g_boxwood' Bosso
TRA#9986 L2 |
|
| Nach oben |
|
|
|
|
|
|
|
|
|
|
| Autor |
Nachricht |
g_boxwood
Anmeldungsdatum: 08.06.2006
Beiträge: 172
|
| Verfasst am: Do 05 Jun 2008, 19:39 Titel: |
|
|
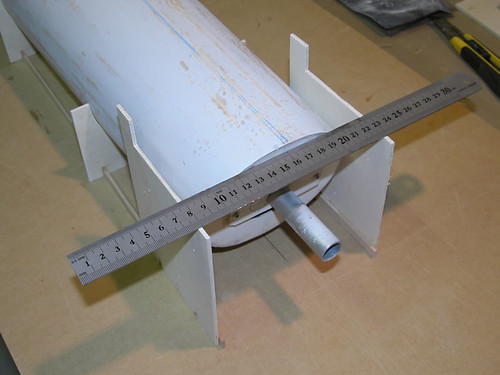
The wing saddle location is found with the CAD approach: once done the correct location can be drawn onto the fuse...

... to guide the cutting:
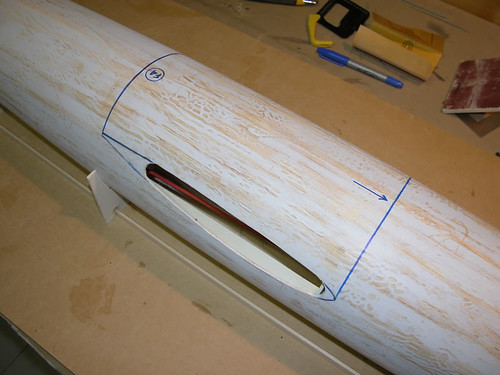
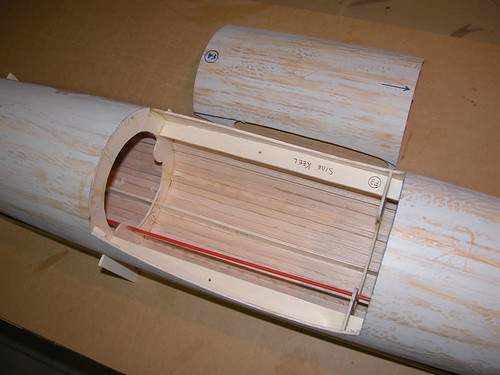

Save the 'belly' section as it will be epoxied back in place after the wing has been installed.
The wing is a conventional 1.5 mm balsa sheeted foam core I'll get cut by a pro as I'm not fond of foam wings... and it will be permanently installed in the fuse @ +3° incidence with respect to the longitudinal axis (the wing tip has a -3° of washout).
_________________
Giacomo 'g_boxwood' Bosso
TRA#9986 L2 |
|
| Nach oben |
|
|
|
|
|
|
|
|
|
|
|
|
Du kannst keine Beiträge in dieses Forum schreiben.
Du kannst auf Beiträge in diesem Forum nicht antworten.
Du kannst deine Beiträge in diesem Forum nicht bearbeiten.
Du kannst deine Beiträge in diesem Forum nicht löschen.
Du kannst an Umfragen in diesem Forum nicht mitmachen.
Du kannst Dateien in diesem Forum nicht posten
Du kannst Dateien in diesem Forum herunterladen
|
|
|
|
|
|
|
|